系统环境:CentOS 6.5/64位
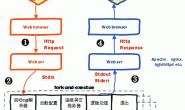
LNMP就是Linux系统,Ningx服务器,MySQL数据库,PHP应用程序。下面介绍在Centos6.5系统下使用RPM包部署LNMP环境,主要是介绍Nginx跟PHP之间使用PHP-FRM连接工作。
最小化安装系统,配置防火墙,SElinux,增加额外YUM资源库
1、开始安装Nginx和PHP-FPM之前,最好先卸载系统中以前安装的Apache和PHP,用root登录输入下面的命令
|
1 2 3 |
[root@localhost ~]# yum remove httpd* php* mysql* [root@localhost ~]# cat /etc/redhat-release CentOS release 6.5 (Final) |
2、关闭防火墙
|
1 2 |
[root@localhost ~]# service iptables stop [root@localhost ~]# chkconfig iptables off |
3、关闭selinux
|
1 2 3 4 5 |
[root@localhost ~]# vi /etc/selinux/config #SELINUX=enforcing #SELINUXTYPE=targeted SELINUX=disabled [root@localhost ~]# setenforce 0 |
4、增加第三方资源库
默认情况下,CentOS的官方资源是没有php-fpm和Nginx的,需要安装第三方资源库即可。
|
1 2 3 |
[root@localhost ~]# wget http://www.atomicorp.com/installers/atomic [root@localhost ~]# sh ./atomic [root@localhost ~]# yum check-update |
二、安装Nginx(默认安装SSL)
|
1 2 3 |
[root@localhost ~]# yum install nginx -y [root@localhost ~]# service nginx start [root@localhost ~]# chkconfig --level 235 nginx on |
三、安装MySQL
|
1 2 3 4 |
[root@localhost ~]# yum clean all [root@localhost ~]# yum install mysql mysql-server mysql-devel [root@localhost ~]# service mysqld start [root@localhost ~]# chkconfig --levels 235 mysqld on |
四、登陆MySQL删除空用户,修改root密码
|
1 2 3 4 5 6 |
[root@localhost ~]# mysql mysql> select user,host,password from mysql.user; mysql> drop user ''@localhost; mysql> update mysql.user set password = PASSWORD('redhat') where user='root'; mysql> flush privileges; ####################################################################### |
五、安装PHP
|
1 |
[root@localhost ~]# yum install php lighttpd-fastcgi php-cli php-mysql php-gd php-imap php-ldap php-odbc php-pear php-xml php-xmlrpc php-mbstring php-mcrypt php-mssql php-snmp php-soap |
安装php和所需组件使PHP支持MySQL、FastCGI模式
|
1 2 3 4 |
[root@localhost ~]# yum clean all [root@localhost ~]# yum install php-tidy php-common php-devel php-fpm php-mysql [root@localhost ~]# service php-fpm start [root@localhost ~]# chkconfig --levels 235 php-fpm on |
六、配置PHP
编辑文件php.ini,在文件末尾添加cgi.fix_pathinfo = 1
|
1 2 |
[root@localhost ~]# vi /etc/php.ini cgi.fix_pathinfo = 1 |
七、配置nginx支持php
检查主配置文件有没有包含额外的配置文件,默认包含,然后直接去编辑default.conf配置文件。
|
1 2 3 4 |
[root@localhost ~]# vi /etc/nginx/nginx.conf http { include /etc/nginx/conf.d/*.conf; { |
|
1 2 3 4 5 6 7 8 9 10 |
[root@localhost ~]# vi /etc/nginx/conf.d/default.conf server_name www.ywnds.com; #修改主机名 index index.php index.html index.htm; #加入index.php文件 location ~ \.php$ { #取消FastCGI server部分location的注释,并要注意fastcgi_param行的参数,改为$document_root$fastcgi_script_name,或者使用绝对路径都行。 root html; fastcgi_pass 127.0.0.1:9000; fastcgi_index index.php; fastcgi_param SCRIPT_FILENAME $document_root$fastcgi_script_name; include fastcgi_params; } |
八、配置php-fpm配置文件
|
1 2 3 |
[root@localhost ~]# vi /etc/php-fpm.d/www.conf user = nginx group = nginx |
九、测试Ningx连接PHP
|
1 2 3 4 |
[root@localhost ~]# vi /usr/share/nginx/html/info.php <?php phpinfo(); ?> |
|
1 2 3 4 5 |
[root@localhost ~]# chown nginx.nginx /usr/share/nginx/html/ -R [root@localhost ~]# chmod 700 /usr/share/nginx/html/ -R [root@localhost ~]# /etc/init.d/mysqld restart [root@localhost ~]# /etc/init.d/nginx restart [root@localhost ~]# /etc/init.d/php-fpm restart |
#在客户端浏览器输入服务器IP地址,可以看到相关的配置信息!
########################################################################
本地浏览器输入:112.74.99.130/info.php
十、这一套LNMP安装教程的版本
|
1 2 3 4 5 6 |
[root@localhost ~]# nginx -v nginx version: nginx/1.6.2 [root@localhost ~]# php -v PHP 5.4.45 (cli) (built: Jan 12 2016 18:09:07) [root@localhost ~]# mysql -uroot -predhat Server version: 5.5.47-cll-lve MySQL Community Server (GPL) by Atomicorp |
阿里云资源库
最后说一点,这一套LNMP我部署在阿里云ECS上的,所以我使用的YUM源是阿里云主机自带的epel.repo文件,具体的文件内容如下(你也可以直接拿去使用,但软件版本会略低)。
|
1 2 3 4 5 6 7 8 9 10 11 12 13 14 15 16 17 18 19 20 21 22 23 24 25 |
[root@localhost ~]# cat /etc/yum.repos.d/epel.repo [epel] name=Extra Packages for Enterprise Linux 6 - $basearch baseurl=http://mirrors.aliyun.com/epel/6/$basearch http://mirrors.aliyuncs.com/epel/6/$basearch failovermethod=priority enabled=1 gpgcheck=0 gpgkey=file:///etc/pki/rpm-gpg/RPM-GPG-KEY-EPEL-6 [epel-debuginfo] name=Extra Packages for Enterprise Linux 6 - $basearch - Debug baseurl=http://mirrors.aliyun.com/epel/6/$basearch/debug http://mirrors.aliyuncs.com/epel/6/$basearch/debug failovermethod=priority enabled=0 gpgkey=file:///etc/pki/rpm-gpg/RPM-GPG-KEY-EPEL-6 gpgcheck=0 [epel-source] name=Extra Packages for Enterprise Linux 6 - $basearch - Source baseurl=http://mirrors.aliyun.com/epel/6/SRPMS http://mirrors.aliyuncs.com/epel/6/SRPMS failovermethod=priority enabled=0 gpgkey=file:///etc/pki/rpm-gpg/RPM-GPG-KEY-EPEL-6 gpgcheck=0 |


